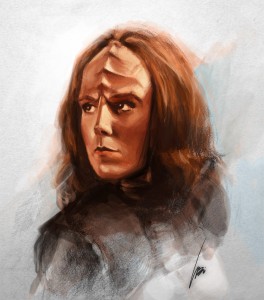
Lou Ferrigno Retro Hulk Sketch and the Effects of the Fixative Spray

I would hate to leave a sketch unfinished, so I spent a little more time on this Hulk sketch and now I can call it done. Please click on it for a larger image.

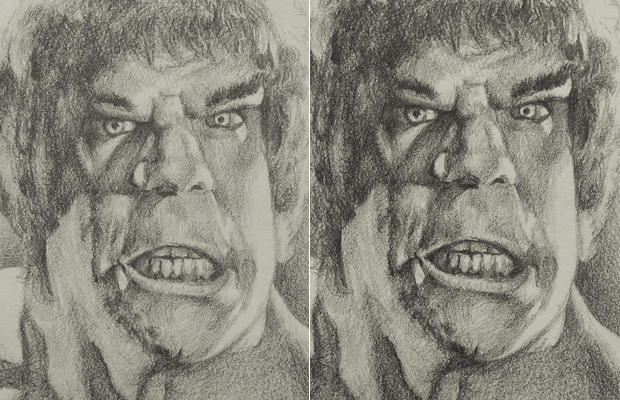
What I wanted to briefly talk about was the effects of Fixative on a drawing. After each drawing, I always spray it with fixative to protect it. Even though it is just a quick sketch, I like to spray it so that it won’t smudge everywhere later on or onto my other drawings in storage. But there is a side effect to using a protective spray. The fixative will have the effects of darkening your drawing. That side effect has always been a plus for me, because that means I don’t have to sketch too dark, which saves me time. It is like applying a ‘contrast’ effect in Photoshop.

Check out the differences in the before and after picture. The left side is my original sketch and the right side is after it was sprayed with Krylon fixative. The results are quite drastic.

The Hulk Lou Ferrigno Sketch – Achieving an Artistic Look on Shadow Areas

Hi everyone. I wanted to record a video showing a quick sketch of Lou Ferrigno as the Hulk. I had placed my video camera above me and the drawing. Only after I have finished recording what I wanted to show, did I realized that my head was in the way of the camera=). What a stupid thing to do. I guess that is all trial and error for a newbie like me. Here’s how the video looked.

So in order to actually show the sketching process again, I continued on to the right side of the drawing. Which is the video you see at the bottom of this post. The proportions on the face are off from the reference as I drew it rather quickly. Had I wanted to look exactly like the reference, I would have used a lightbox to trace the main features. Yes, I do trace! And most artist do too. But that’s another story, we’ll talk about that another time.

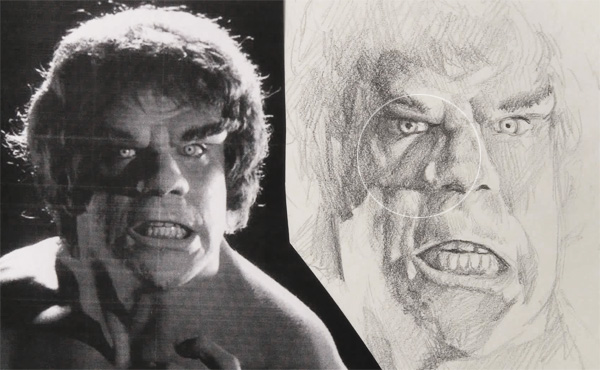
What I really wanted to talk about is how you can render the shadow areas. One of the things that makes a drawing artistic and more captivating is the liberty that an artist can take with it. Instead of drawing it as you perfectly see it in real life or from reference, you can make it more interesting. One way to achieve that is how you render the shadow areas. On the picture of the Hulk reference and sketch, look specifically at the shadow  that is cast by the nose. In the reference, it is completely dark as the photographer intentionally removed any kind of bounce light on that area. But on the sketch, I left the shadow areas lighter than the edge of the shadow. This makes the sketch more artistic and less realistic. You will see this method on many other drawings by other artist. They rarely fill in the shadow areas completely dark, unless it is a specific dramatic feeling they want to achieve. Give it a try the next time you are sketching dark shadow areas.

Here is the video for the remainder of the drawing. The video is played at 4 x the actual speed.
Do you find this kind of video useful?

Sherry Jackson as Andreas – Women of Star Trek The Original Series Illustration

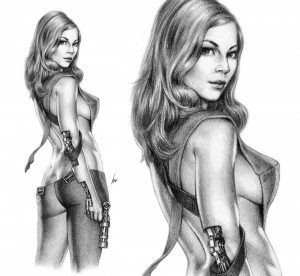
I finally got this Andreas (Sherry Jackson) drawing up. It usually takes a little bit of time to get a drawing ready for display. I need to spray the drawing with fixative, scan the drawing, then cleanup the scan in Photoshop. So anyhow, here she is. Not a whole lot like Sherry Jackson. But you can’t miss her in that costume. Andreas is the first in my Women of Star Trek illustration series.

For my second drawing, I will be drawing Magda, played by Susan Denberg. She is from the Star Trek Original Series episode “Mudd’s Women.” Doing a little research, Susan Denberg actually appeared in Playboy, as miss August all the way back in 1966. You can see it here if you like: Susan Denberg Playmate August 1966. Warning, nudity.


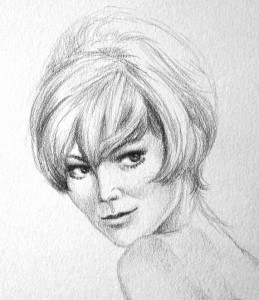
I’ve got a pose for Magda, and here is the start of the drawing. I tend to start with the face. I think most people do too. I figure the face is the hardest and most important part, and if I am going to screw it up, might as well do it early so I can start over.

I really dig the hair on her. It’s a whole lot sexier than what we have today in my opinion. With this kind of cool hairstyle, I actually don’t mind drawing the hair. Fun stuff.

Klingon Suzie Plakson Illustration – Using a Mask in Photoshop for Artistic Look

I had an urge to do quick sketch of a Klingon women (don’t ask why), so I decide to draw Klingon Ambassador K’Ehleyr played by Suzie Plakson. Well, the sketch turned out horrible! It usually happens when I try to draw too fast. It ends up with the dark tones being too dark everywhere. With erasing and redrawing, it just turns into a mess. You really can’t erase too much on paper because it takes away the grain or tooth of the paper. Drawing on it then becomes slippery and you end up with shading blotches. So anyhow, I was at the point of tossing it into the trash until I gave it my last effort of salvaging it by taking it into Photoshop for some color.

The color turned out okay but rather boring. I wanted to make it more stylized and artistic, so I simply used a mask to blend the two together. It is a quick process in Photoshop and works quite well. Here’s how it went.


Artistic look by painting a mask in Photoshop
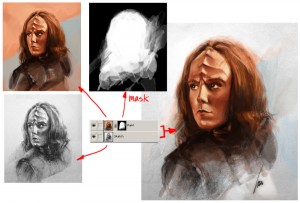
Once you have your sketch painted, just put the painted layer on top of the sketch layer. Then create a mask for the painted layer. In the mask, everything you paint white will show the painted layer, black will make it transparent and show the bottom sketch layer. Any shades of grey will be a blend between the two. Nothing really special here, just your basic mask.

I do like to use this method because it is very flexible and it allows you create a nice blended look without modifying either of the original layers. Keep painting the mask until you get something you like. Now a very important shortcut key to use in this process is the shortcut key X. The X allows you to switch your current brush color selection from Foreground to Background and vice versa. Since you are painting the mask, Photoshop automatically sets the two values to black and white. You need to switch back and forth quickly because you will notice that you will be painting with blacks and whites constantly to get the artistic blend that you want.

Click on the image above to see my Photoshop layers. In the final image, I did add some whites to give it more of a visual pop. That layer is not shown, but you get the idea. Hope you find this helpful. Please share any comments or work-flows of your own in the comment section below. Thanks, -Wei
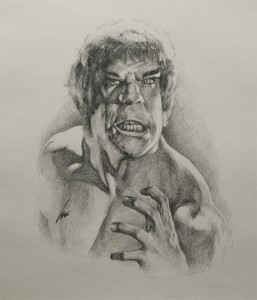
Make 3D Prints at Home with MakerBot Replicator!

I was reading the current issue of Fast Company on my Kindle and came across an article about this MakerBot Replicator. For about $1800, you can have your own 3d printer! After going through the website, this replicator looks like a consumer grade 3D printer. The current model can print at about a size of a loaf of bread, which is quite large. The resolution seems rather low though. You’ll need a lot of sanding to get it smooth. It uses ABS plastic which is an inexpensive material. Buyers seems to be using this as a tool to just have fun with. They are making everyday objects, like toothbrush holders, camera lens hood, gears, little toy figurines, etc.

I would be interested in this for outputting my 3D statues. Again, the resolution seems low, and it would be a sanding nightmare to make a clean prototype. If that is even possible with their current resolution. But it would be fun to be able to instantly have a 3D mock-up print of your model. I would love to use this to make cool toys for my kids, like little toy robots! It just opens up a whole new world of possibilities.

Click on the image above and it will take you to their MakerBot site. You can check it out yourself. Their front page has a good intro video by their co-founder and CEO Bre Pettis. He’s got this mad genius look.