Painter Igor Kazarin – Dry Brush Portrait Master

I came upon the artworks of the Dry Brush portrait master, Igor Kazarin. You have to check out this technique and his work. It is simply amazing. The speed at which he is able to paint a portrait with this dry brushing technique is mind-boggling. About 5 hours for a portrait! You have to see this to believe it. Time to get some paints and brushes!

From Igor Kazarin’s website:
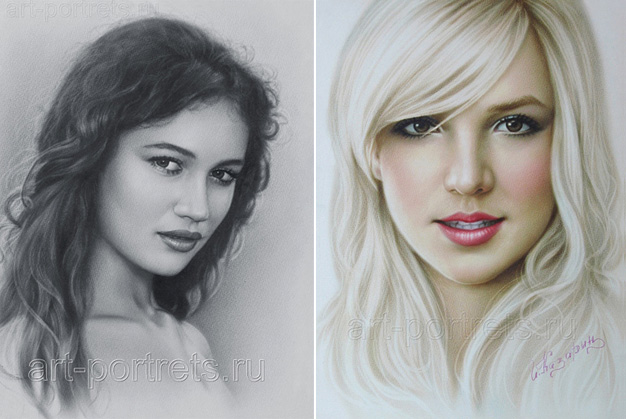
Igor Kazarin Dry Brushing Painting Techniques


What is a drybrush technique?

Dry brush technique is a modern style of painting in which oil paint, bristle and synthetic brushes are used on watercolour paper or fabric. A few drops of solvent is used as well and a rubber eraser for highlights and details.
Why it is called Dry Brush technique? Black oil paint (of any kind) is squeezed from the tube onto the palette, only a little bit and if desired, 2-3 drops of domestic sewing machine lubricating oil or diesel fuel is added as solvent. Slightly touch the paint with the paintbrush and rub it on a palette so that the brush is actually almost dry.

For a black and white portrait about 0.5 cubic centimeter of black oil paint is enough. Then apply a very thin layer of paint on watercolor paper or fabric. The result: the surface is not greasy when you touch it, therefore you can frame it or roll it up for transport without a frame. At first glance Dry Brush is very similar to pencil portraits. In fact, pencil is actually used: some artists depict the picture initially by drawing a pencil sketch and only then do they start using a brush with oil paint; while other artists do not use pencil at all and use dry brush technique from start to finish – like some of the artists of Moscow’s Arbat street used to do. The most important feature of dry brush technique is that it allows speed drawing with excellent quality in a very short time, so a portrait artist can earn much more money this way than using any other drawing techniques

You can continue this Dry Brushing technique article through Igor Kazarin’s Website.
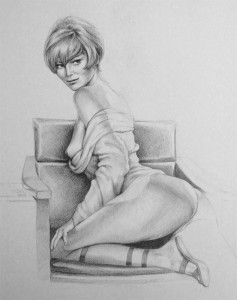
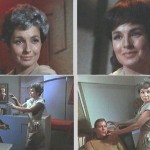
Susan Denberg as Magda in Mudd’s Women

Playmate Susan Denberg as Magda in Star Trek Original Series Mudds WomenHere is an update on my Magda (Susan Denberg) drawing from the Star Trek Original Series episode Mudd’s Women. Magda is by far the hottest of the Mudd’s women. What else would you expect from a playmate!

This is my second drawing in my Women of Star Trek series. Here I have Magda posing in captain Kirk’s chair! Should be interesting. I like how she is coming along, but the chair needs some thinking. The chair is rather boring and I am not sure how much of the chair will be fully rendered in. I think just enough to let the viewer know that it is the captain’s chair on the Enterprise, and that should be good enough.

I am already thinking about my next Women of Star Trek drawing. Perhaps Nancy Crater as the Salt Vampire in the episode The Man Trap? I have this idea of doing a blend of her as Nancy and the Salt Vampire.

Nancy Crater as the Salt Vampire in the Man Trap

Nancy Crater, the Salt Vampire

Or how about Barbara Babcock as Mea 3 in the episode A Taste of Armageddon. She is absolutely gorgeous and with that flowing rob of hers, it could be HOT!

Okay, I will stop now as I don’t want to jump too far ahead or I might lose motivation to finish this Magda drawing.

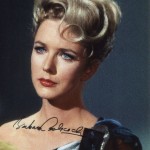
Barbara Babcock as Mea 3 in A Taste of Armageddon

Barbara Babcock as Mea 3


Improve Your Art by Drawing From Reference

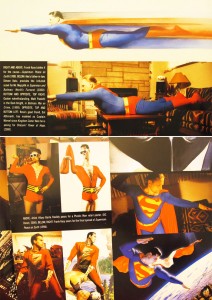
In Mythology: The DC Comics Art of Alex Ross, Alex Ross said on the use of live models, “Before that I have no idea how much I could grow as a draftsman. It was a huge turning point, because all through grade school I hadn’t so much as drawn from photographs. I’d always thought that you had to make it all up out of your head, and that’s how you did ‘fantasy’ illustrations. Now I wonder if I would have developed even sooner had I drawn from life as a child.”

Alex Ross is spot on with that comment. It is so true. Early in my drawing days, I felt the same way, that you were copying and NOT drawing if you had used references. It was only not too long ago that I started to draw from references. I think most artist has a lot of pride and feels that what they create has to be original, and anything that is referenced is cheating, and not really their own. What is art if it is not your own? I felt that way for most of my life. But now I don’t. And you have no idea what a breakthrough it has been for me. You have to get it out of your head if you still think referencing is cheating and not original. I guarantee you will be come a better artist once you start drawing from reference, or from live models as what Alex Ross likes to photograph and use. Seriously, I don’t think anyone can say that Alex Ross’s work is not original.

From Mythology: DC Comics Art of Alex Ross, showing his use of live models for references

The next time you want to draw something, make sure you have some references. Through the use of references, you are going to improve your skills by seeing how things really are. You will see, through real life, the forms, the highlights, shadows, bounce lights, etc. Eventually you will be able to draw convincingly without references, because you will have a great understanding of light and how to render any forms realistically. But even at that point, you should still use references, especially for more important drawings.

I use live references all the time. Just pose yourself or anyone else that is willing to be photographed. You can use natural window lights or artificial lights like a simple desk lamp. Whatever works. I fancy myself as an amateur photographer, and I think most artist do too=). So I have some professional photography equipments that I use for specific lighting. But you don’t have to have them, simple household lights will work just as well.

So next time, grab your girlfriend, boyfriend, wife, mistress, or your neighbor’s dog and take their photo for reference!

My Essential Tools for Drawing and Sketching

Hi everyone! Finally got around to doing some intro videos that I was always planning on doing. I got under the weather last week and finally got my voice back. So for starters, these are videos on my drawing tools. This is currently what I am using for all my sketches.

The videos are split up into 3 parts as it turned out to be longer than I had anticipated after shooting and editing. The videos and a summary of each is below.

These intro videos are somewhat basic, but nonetheless very important, especially if you are just starting out. And even if have been drawing for awhile, there are probably tips in there that you can try out. There is always something you can learn from your fellow artist. So I hope you find them helpful. And please do share any comments or tips that you might have of your own below.

http://youtu.be/_YEjAIFCoyw
Part 1 – Pencils HB, 2B, 4B, 5B. My primary pencils. The HB is for general sketching and outlines, plus some shading. The 2B is for in and around the midtone. I use the 4B for the dark areas, and the 5B for very dark areas. Set of Two, Dull and Sharp. Always have a set of each grade, a dull one and a sharp one. This allows me to switch back and forth quickly between the two depending on what my needs are.

http://youtu.be/YXlw7I0eQhA
Part 2 – Pencil Extensions. Use this to make your pencils longer and more powerful=). Mechanical Lead Holders. An alternative to wood pencils. Save money over the long term as leads are less expensive then wood pencils.

http://youtu.be/7qk-UHKoTZY
Part 3 – Kneaded Erasers. Intro and how to use them. Dab into paper to lift the lead instead of rubbing. Electronic Erasers. Use this to get sharp and clean highlights.