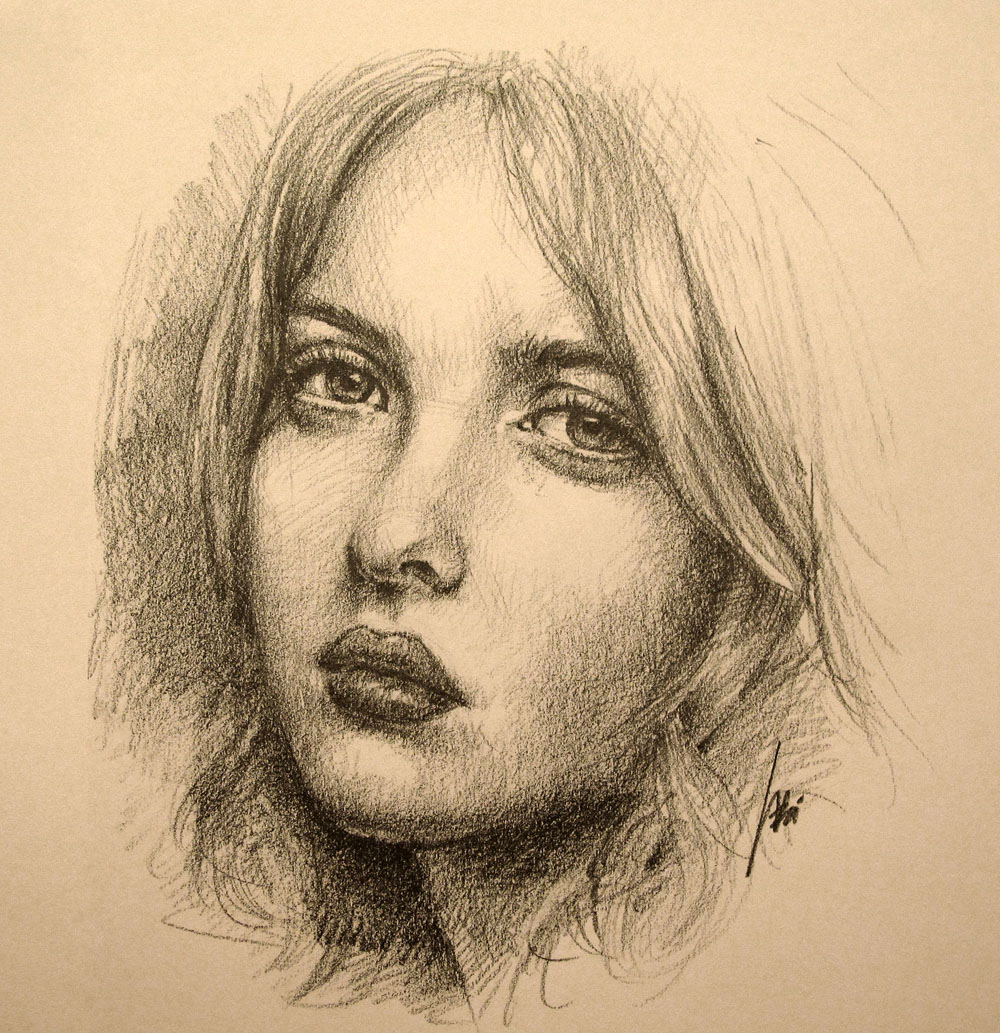
This is a sketch for a portrait video I was working on. You can see the video under the How to Draw section. This was drawn with a 4B pencil.
This is a sketch for a portrait video I was working on. You can see the video under the How to Draw section. This was drawn with a 4B pencil.
I think most artist at one point or another has tried designed their own concept cars. I remember drawing cars in my perspective drawing class. It was one of the more enjoyable aspects of learning perspective. And really, knowing perspective is the key to drawing cars. Without it, the proportions in your car sketch will not be convincing. We are so accustomed to seeing correct perspective that any major perspective errors in your car drawing will create unwanted proportions.
So the key to drawing cars is learning how to quickly draw perspective boxes. The boxes does not need to have perfect perspective–getting it close will suffice. In my video below, I will talk about laying the foundation for a car drawing. Then I will do a quick example of a concept car. My car doesn’t look very good as it is just quickly off my head. It usually takes quite a bit of sketching and brainstorming to be able to get a decent looking concept going. Anyhow, hope you enjoy the video.
Drawing cloth could be a tedious process. But it is not harder than any other things you might draw. Here are some tips that will improve your cloth drawing.
Drawing Cloth Tip #1
Visualize the form and flow. With cloth, this is especially important as the flow and wrinkles have to be defined in order for your cloth to be believable. A quick way to better visualize the form is to draw a line on the cloth as if it’s riding on the surface of the cloth. It is like drawing a cross section. This will help you see what the cloth surface is doing.
Drawing Cloth Tip #2
Exaggerate the reflective lighting on the cloth. Since the cloth will most likely have many rounded areas is it tucks in and out, exaggerating the reflective lighting will help to intensify the curvature of the cloth. This will make it more three-dimensional.
Drawing Cloth Tip #3
Have good contrast between light dark and light areas. When the area of the cloth tucks under to another layer, make that edge dark to help push out the upper layer. Visually, anything dark will be perceived as receding and anything lighter will appear to come forward. Therefore, increasing the contrast in the edge of those areas will give your cloth more depth.
There are many how-to-draw videos and tutorials online, and some of them are very good. If you have been following me, you know I have been doing some videos on drawing with pencils as well. Some of my drawing videos has gotten pretty good responses from viewers, so I am posting my top three videos here.
In my videos, I try to approach it differently than from many others out there. Instead of showing you how to draw a specific thing, I want to show you how to draw anything. And that involves showing you the very basic fundamentals of drawing. Which is what? Well, doing a drawing is mostly repetitious work. It is nothing more than a series of strokes. How you apply the strokes makes all the difference. Therefore, it is all about hand control. Once you master hand control, you will be able to apply the knowledge in your head to paper. Without hand control, it doesn’t matter how many art books you read, you can’t translate that on paper.
That is what I am starting with–hand control. Judging from the feedback I get from viewers, I am pretty sure it will help you if you are a beginner artist. Let me know what you think. Thanks, -Wei
Quoting from Anthony Ryder’s The Artist’s Complete Guide to Figure Drawing, “Hatching is a shading method that employs lines in series, arranged in shaped progressions, and either parallel or radiating. Hatching is a rhythmic activity; the pencil moves like a sewing-machine needle. The trick is to get lines evenly spaced, gradually increasing or decreasing in length, and in the right value range and progression…Cross-hatching is hatching on top of hatching, with the layers of hatching crossing at an angle. There’s no limit to the number of layers if cross-hatching that can be applied in the drawing. To “mist” a drawing with a value, cross-hatching can be done very softly, as if you were applying washes of value with a brush rather than individual lines with a pencil. A finished drawing is a composite of many such “mistings” of value, carefully fitted into the contour.”
I love Anthony Ryder’s book and his description of hatching and cross-hatching techniques. His use of “misting” to describe the shading method really hits home. That’s what shading is all about, layers and layers of mistings. You should check out his figure drawing book if you haven’t. His masterful shading is very inspirational.
To be able to do hatching and cross-hatching, you need to have good hand control. Many drawing books seems to glaze over this area. I suppose we take hand control for granted as it’s something so basic to all artist. But if you’re a beginner artist, I’m sure you struggle with hand control. Your shading might be inconsistent, or too monotone and dull. You probably have uneven shading on large areas. It’s a tough thing to do, and I still struggle with it sometimes, especially on large areas. But with practice, you’ll begin to have a much better feel of your pencil rubbing against the surface of the paper. Soon you’ll be able to perform minute pressure adjustments to get the correct “misting.” So here is a couple of exercise that you can do to improve your hand control. I know this will help if you’re a beginner artist.